| Steering rack preload adjustment | ||||
|
Have a clunk or excessive play in your steering?
I've had a noticeable clunk in my steering rack for around 6 months now, and I finally traced the problem specifically to the rack preload adjustment.
If that sounds confusing, here's a quick explanation:
Over the years the rack loosens up a little in the
housing, so you have to tighten the pressure that is applied to hold it firmly
in the housing. When it loosens up, the rack will actually twist as the teeth
engage into it, which is where the clunking and play comes from (in addition to
any worn out tie rod ends).
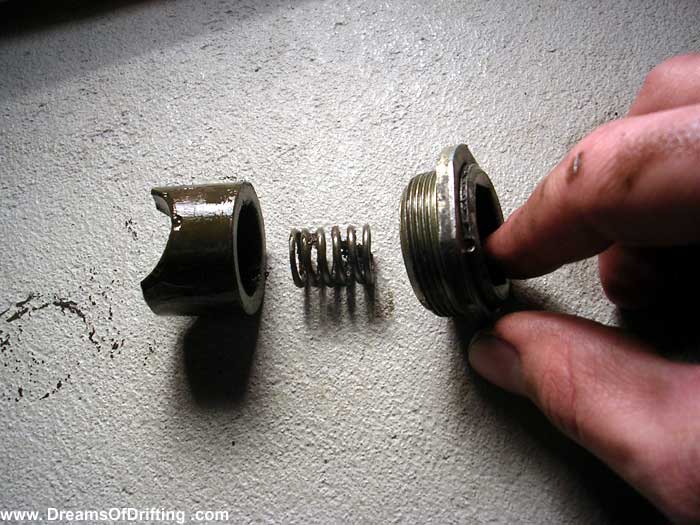
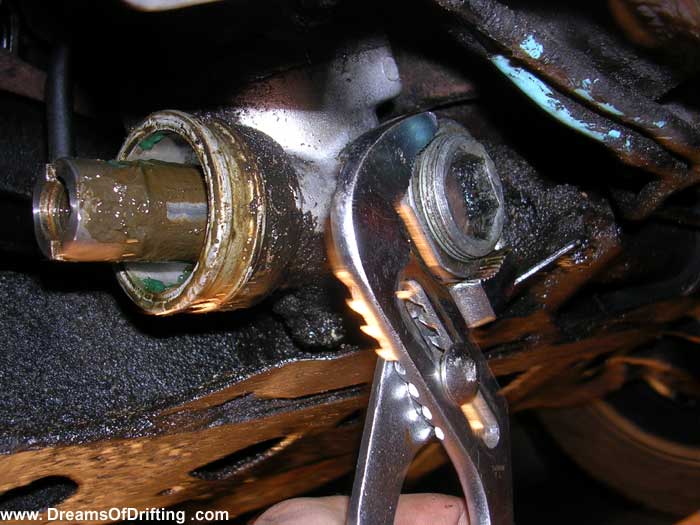
Take a look at the pictures on the left...
The part that you adjust to apply pressure is the one you see with the large hole for an allen key. Chances are you don't have a 24mm allen key, but I made due with a 22mm crown bolt I had laying around. Once you loosen the lock nut (that thin squared nut sitting around the adjusting screw), you'll need very little force to turn the adjusting screw, which is why you can get away with using a 22mm bolt.
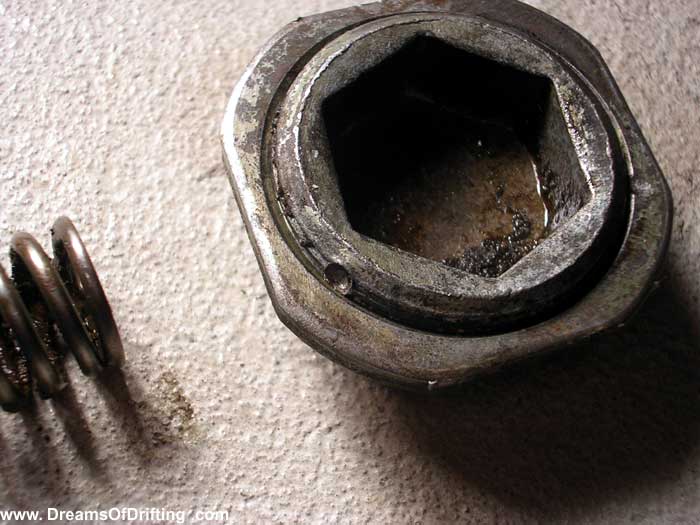
If you have a look at the close up shot of the adjusting screw, you'll be able to see a divot (small hole) that has been pierced into the threads preventing you from turning the adjusting screw inward any further than it already is. I'm sure this was a great safeguard 20 years ago when the rack was brand new, but now that you need that adjusting screw to push a little deeper into the rack, it can be a problem.
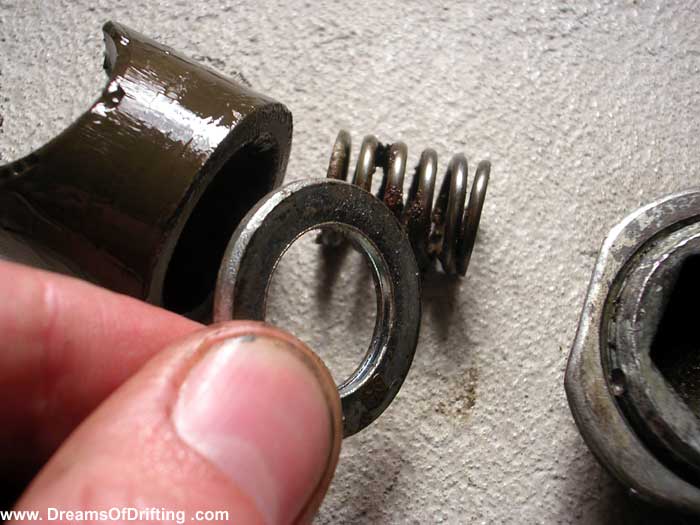
My solution was to grab a washer that best fit the diameter of the adjusting screw, which still allowed the spring to sit in the middle. The washer I used is from an OEM Toyota aluminum wheel lug nut. By doing this, I'm pushing the adjusting screw outward, and it will free up the threads I need to properly adjust the rack. I lubed both sides of the washer with brake caliper grease.
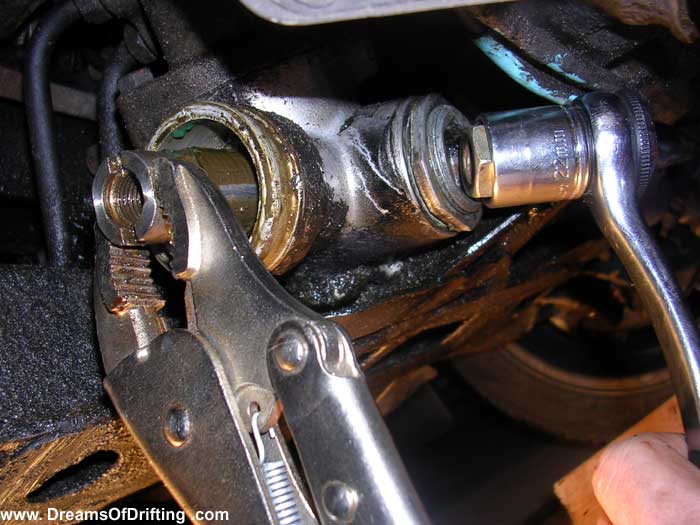
When making the adjustment, keep a pair of vise grips secured to the end of the steering rack. If you can wiggle it clockwise and counterclockwise, it means you need to tighten the preload of the rack (screw the adjusting screw in). The idea here is to remove as much play from the rack as possible, but just enough so that your steering wheel still turns without any additional effort.
When I made my first adjustment, I set the preload too high, and when I went on my test drive, the steering wheel actually stuck in a turned position when I went around the corner, instead of easily straightening itself out as usual, so I had to manually turn the wheels back into a straight position to avoid doing a donut.
Once you think the adjustment is correct, and you're ready to go for a test drive, be sure to tighten that thin squared lock nut that sits around the adjusting screw!
Good luck!
-Migs
Dreams of Drifting Copyright © 01/2000 Chris Migs all rights reserved
|
The Benefits?
In over 5 years of owning and driving AE86's, I have never enjoyed such precise and accurate steering. I always wondered my steering never felt as I thought it should, but always assumed it was it just a matter of the rack being worn out.
I'm honestly upset that I didn't know about doing this sooner, as it would have made a huge impact on my learning curve with the car. OH well!
*NOTE*
Keep in mind, having a tight rack means that you'll be wearing the rack out faster than if you had left it loose, or adjusted it with just a liiiiittle bit of play. So be sure not to set the preload too high!
|
||